

How to Make Seed Beaded Slider Clasp Bracelets

This seed beaded sliding clasp bracelet stands out as both stylish and functional. It’s a somewhat minimalist design, where you can still express your personal style, both in the color choices and pattern options. This tutorial will guide you through the process of crafting and personalizing the clasp for a bracelet that not only showcases your artistic flair but also serves a practical purpose with its unique sliding mechanism.
Want to learn more about SilverSilk Leather Knitted Chain? Find the education page here: https://www.silversilkonline.com/knitted-leather-chain
Gather your materials and let’s get started!
Tools:
Cutters (Lindström Tools): Flush cutters are used to cut your SilverSilk Knitted Leather Chain and craft wire.
Wide Nose Pliers: Wide nose pliers are used to close SilverSilk 9mm terminators.
Chain Nose Pliers: Chain nose pliers will be needed to weed the ends of your Leather chain and to open and close jump rings.
Nylon Jaw Pliers: These pliers are essential for smoothing as well as tightening the craft wire as you work.
Check out this video on SilverSilk tools in case you need my personal recommended list: http://silversilkonline.com/recommended-tools
Materials:
30in • 28 Gauge Craft Wire
4gr • Size 8/0 Seed Beads, 1gr each of four colors
The Slider Clasp Bracelet Video Tutorial
The Slider Clasp Bracelet, Written Step-By-Step Guide

Step 1: Planning the Slider Clasp Pattern
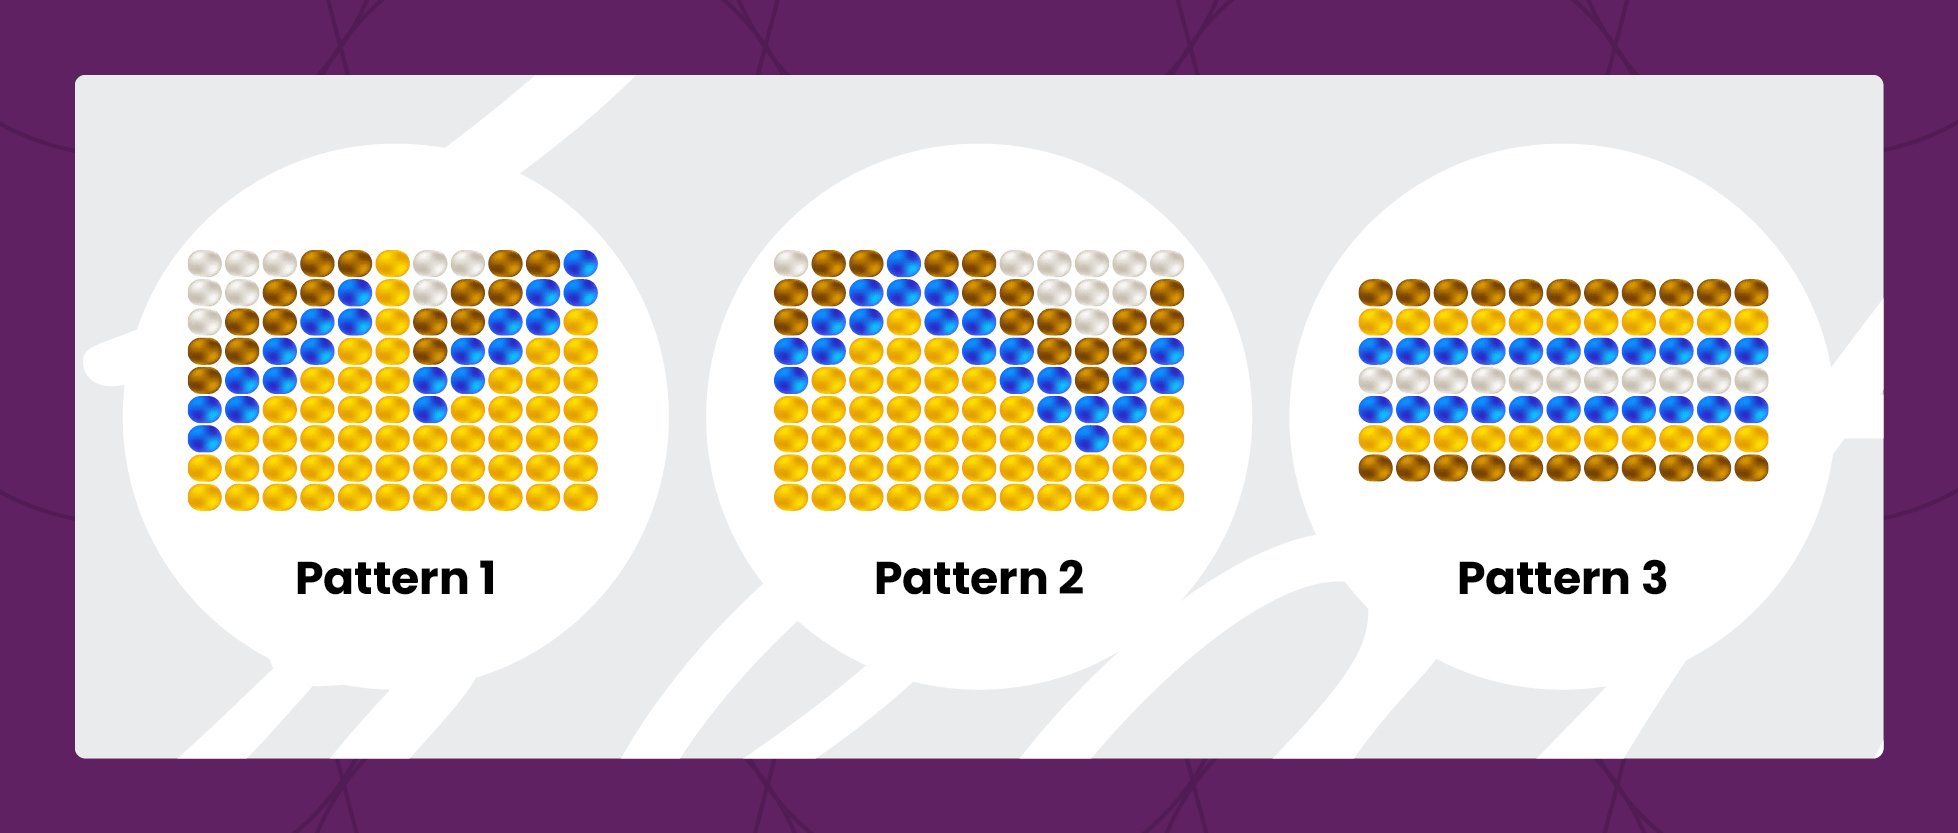
Choose or create an 11-column pattern with seven to nine seed beads per row. Three pattern ideas are provided here, but you can easily sketch your own using graph paper and some colored pencils. Keep in mind that the center row will be the attaching row, so only the adjacent rows will be visible.

Cut a 30-inch length of 28-gauge craft wire. Run your nylon jaw pliers along the wire to smooth out any bends or kinks. This process also warms up the wire molecules, making it way more flexible and easier to work with.
Begin stringing the middle row of your design and bring it to the midpoint of your wire.gemstones.

Step 2: Stringing the Design on Craft Wire
Bend the wire and string on the next row from the middle. Go back through the first row, forming a loop. Smooth out the wires and adjust the beads so the rows sit side-by-side.

Step 3: Weaving through the Rows
After adding a new row, pass the wire through it again to secure the position and prepare for the next row.

Step 4: Continuing the Design
Finish the rows for this side, which includes your center row plus the five new rows. Your wire should exit the last row added.

Step 5: Completing the Design
Use the wire from the midpoint to weave the five rows of the opposite side.

Step 6: Clasping the SilverSilk Leather Chain
Bring the SilverSilk Knitted Leather Chain over the beaded swatch. Roll one side of the swatch over the chain to meet the midpoint seed bead row. Then, take the wire exiting from the edge row through the midpoint seed bead row.

Step 7: Finishing the Seed Bead Tube Clasp
Next, you’ll need to bring the wire back through the edge row to close the tube on the bottom side. From here, your wire will be on the edge row and go ahead and weave through two rows to secure the wire before trimming it off.

Step 8: Closing the Seed Bead Tube Slider Clasp
Loop the other end of your Knitted Leather Chain to cross over the beaded swatch, laying it over the open side of the slider base. Repeat Steps 6 and 7 to fold the open side into a tube and join it to the middle row. Weave in the craft wire and trim off the excess to complete the slider.

Step 9: Checking the Fit
Adjust the Knitted Leather Chain in the slider clasp to determine the length needed to fit over the widest part of your hand.

Step 10: Finishing the Design
Trim the ends of your Knitted Leather Chain to a 1-inch length past the slider edge. Attach SilverSilk 9mm Terminator End Caps to the raw ends to complete the bracelet.
How to Wear It:
The terminators will stop the chain from coming loose from the slider clasp. The chain will be a snug fit in the clasp, sliding when you pull on the chain from each side. Adjust to tighten after placing on your wrist like a bangle.
Conclusion:
The best bracelets are the easiest ones to put on! Well, maybe not all the time but these were certainly effortless to make, and to wear. The best part is that you can make a bunch of them and wear them like bangles that match any outfit or season. Be sure to check out the video tutorial for this design and remember to like and subscribe to the SilverSilk and More YouTube Channel.
Follow us on social media for updates, behind-the-scenes, and more:
Youtube • Instagram • Facebook. • The SilverSilk Virtual Community
Get text notifications:
Text “hello” to +1 (918) 233-6387